这篇文章记录的是使用certbot这个客户端程序另外完成服务器安装使用SSL服务的过程,项目官网(https://certbot.eff.org/)
1.首先更新epel源
#yum install epel-release
2.下载certbot客户端,并安装客户端依赖
# wget https://dl.eff.org/certbot-auto -O /usr/local/certbot
# chmod +x certbot-auto
# 安装依赖
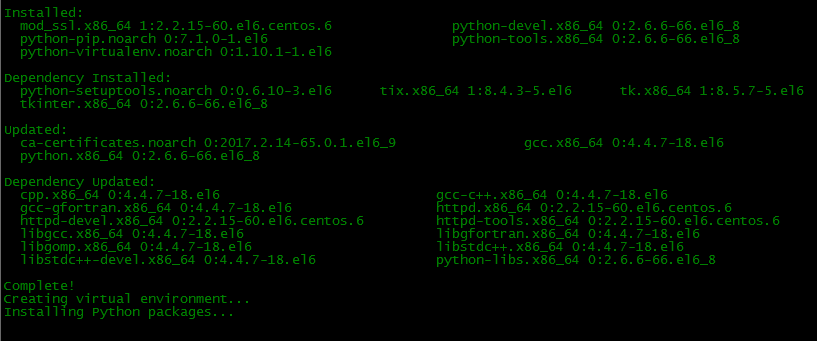
# ./certbot-auto -n

这个过程(安装依赖)会与些长,如果觉得累绝不爱,那就省略依赖安装过程,直接进入证书签发过程。另外为了解决这个慢的问题可以设置pip源:
# vi ~/.pip/pip.conf
[global]
index-url = http://mirrors.aliyun.com/pypi/simple/
[install]
trusted-host=mirrors.aliyun.com
当然,为了便于后面不出现一些意外,可以先做下面几个操作先。
A.修改对应主机的nginx配置文件
server{
listen 80;
server_name www.xxx.com;
index index.html index.htm  index.php;
root /alidata1/web/www.www.com;

access_log off;

#error_page 404 /404.html;
#error_page 403 /403.html;

# 为certbot新添加
location /.well-known/ {
 add_header Content-Type 'text/plain;';
   root /alidata1/web/www.www.com;;
}
# 必须要有
if ($scheme = http ) {
    return 301 https://$host$request_uri;
  }

}
server{
listen 443 ssl http2;
server_name www.xxx.com;
index index.html index.htm  index.php;
root /alidata1/web/www.www.com;

access_log off;

#error_page 404 /404.html;
#error_page 403 /403.html;


  ...

   # 为certbot配置 必须在后面的那个deny all 前面配置
   location ~ /.well-known {
   allow all;
  }

  location ~ /\.ht {
    deny all;
  }


}
B.在对应网站根目录下创建目录.well-know
# mkdir -p /alidata1/web/www.www.com/.well-know
3.设置签发证书
# 单个网站单个域名
# ./certbot-auto certonly --email admin@xxx.com --agree-tos --no-eff-email --webroot
-w /alidata1/web/ -d www.xxx.com
#  单个网站多个域名
# ./certbot-auto certonly --email admin@xxx.com --agree-tos --no-eff-email --webroot
-w /alidata1/web/www.xxx.com -d www.xxx.com -d www2.xxx.com
# 多个网站多个域名
# ./certbot-auto certonly --email admin@xxx.com --agree-tos --no-eff-email --webroot
-w /alidata1/web/www.xxx.com -d www.xxx.com -w /alidata1/web/www2.xxx.com -d www2.xxx.com
以上配置方法以此类推,配置完成之后会告诉你在
/etc/letencrypt/live/www.xxx.com/
这个目录下有证书和密钥,然后将以下代码:
  ssl on;
  #证书和密钥
  ssl_certificate   /etc/letsencrypt/live/www.xxx.com/fullchain.pem;
  ssl_certificate_key /etc/letsencrypt/live/www.xxx.com/privkey.pem;
  ssl_session_timeout 5m;
  ssl_session_cache shared:SSL:20m;
  ssl_protocols TLSv1 TLSv1.1 TLSv1.2;
  ssl_ciphers ECDHE-RSA-AES128-GCM-SHA256:ECDHE:ECDH:AES:HIGH:!NULL:!aNULL:!MD5:!ADH:!RC4:!DH:!DHE;
  ssl_prefer_server_ciphers on;
添加到A说明的server 443端口设置段内:
...前面是80端口的设置

server{
listen 443 ssl http2;
server_name www.xxx.com;
index index.html index.htm  index.php;
root /alidata1/web/www.www.com;

access_log off;

#error_page 404 /404.html;
#error_page 403 /403.html;

 ssl on;
  #证书和密钥
  ssl_certificate   /etc/letsencrypt/live/www.xxx.com/fullchain.pem;
  ssl_certificate_key /etc/letsencrypt/live/www.xxx.com/privkey.pem;
  ssl_session_timeout 5m;
  ssl_session_cache shared:SSL:20m;
  ssl_protocols TLSv1 TLSv1.1 TLSv1.2;
  ssl_ciphers ECDHE-RSA-AES128-GCM-SHA256:ECDHE:ECDH:AES:HIGH:!NULL:!aNULL:!MD5:!ADH:!RC4:!DH:!DHE;
  ssl_prefer_server_ciphers on;

  ...

   # 为certbot配置 必须在后面的那个deny all 前面配置
   location ~ /.well-known {
   allow all;
  }

  location ~ /\.ht {
    deny all;
  }


}
如果有多个网站建议只用一个证书,方便管理。
4.由于证书的有效期只有90天,为了偷懒可以设置定时自动检测更新证书
#crontab -e
30 3 * * 1 /usr/local/certbot/certbot-auto renew --force-renew
50 3 * * 1 /etc/init.d/nginx reload


